We bought the playhouse on sale for $450 plus shipping. I know - not so cheap. I did so much looking around on this one though - I looked at all sorts of playhouses, even sheds suitable for using as a playhouse. And I priced out the materials for just building our own. For us, it was going to cost almost $500 in materials and transportation costs and I'm sure the end result would have been questionable! I don't really trust my carpentry skills.
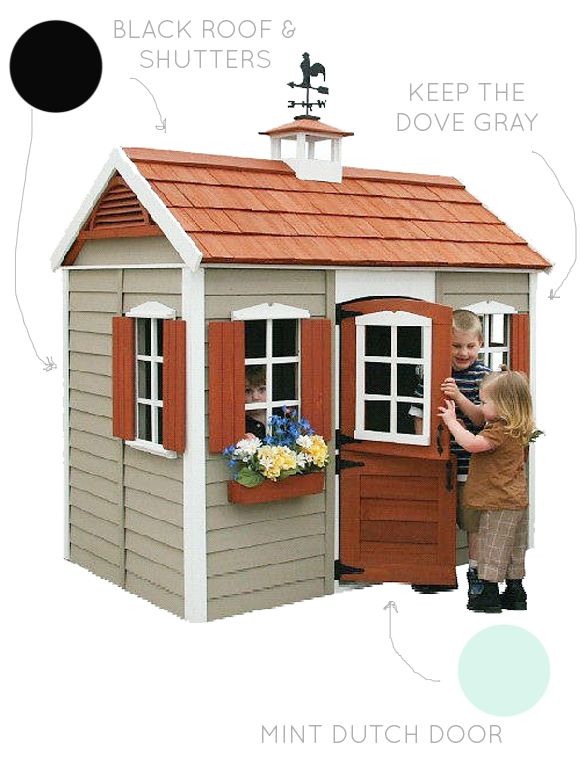
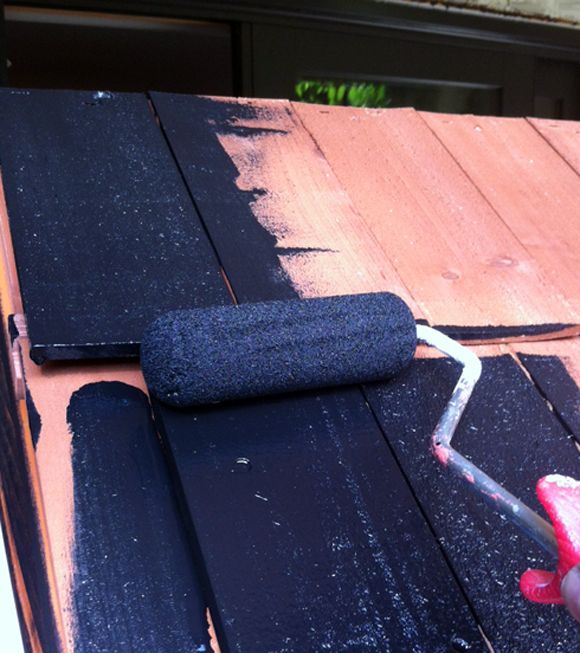
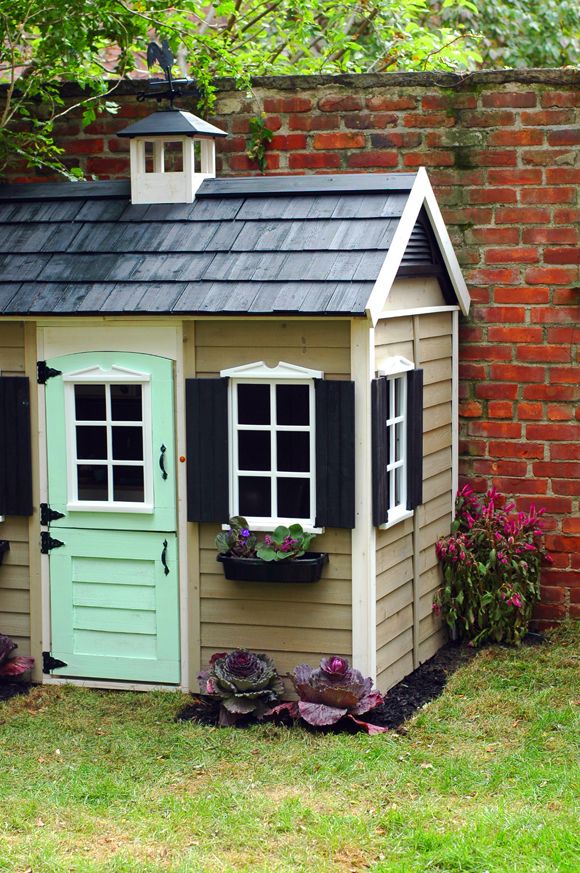
The house comes (very) disassembled and in a giant, heavy box. If putting together IKEA products makes your head spin, you might want to hire this out to a handyman! Luckily, Michael came to my rescue and put the house together on the lower deck with my very helpful brother in law, Matt. I forgot to paint the shingles and door before Michael and Matt put the house together, which was a bit of a pain, but not that big of a deal to paint with a roller after the fact. (I used Rustoleum's black enamel in flat finish for the roof and shutters.)
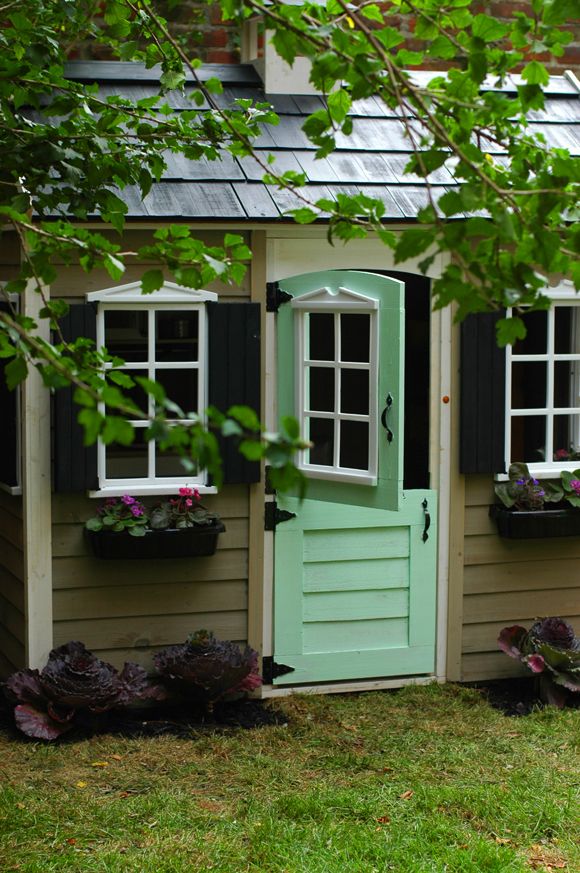
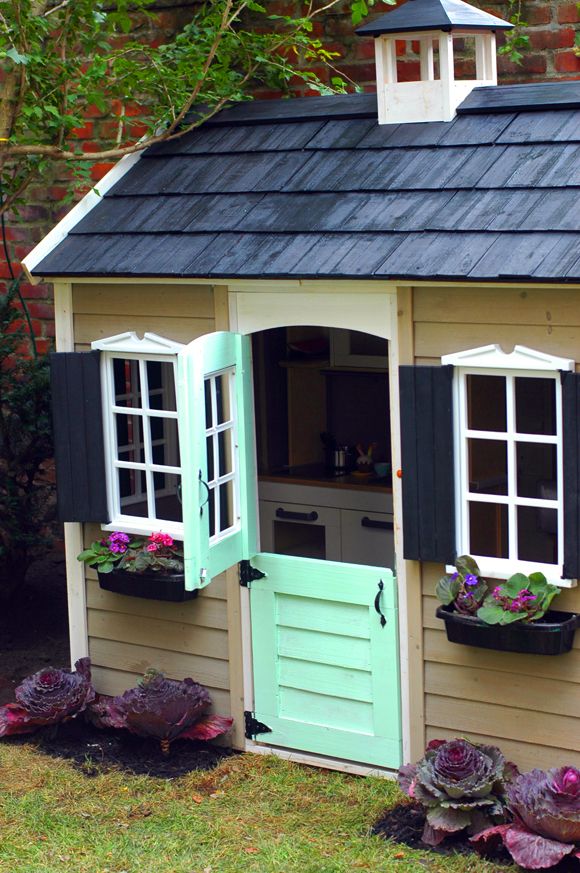
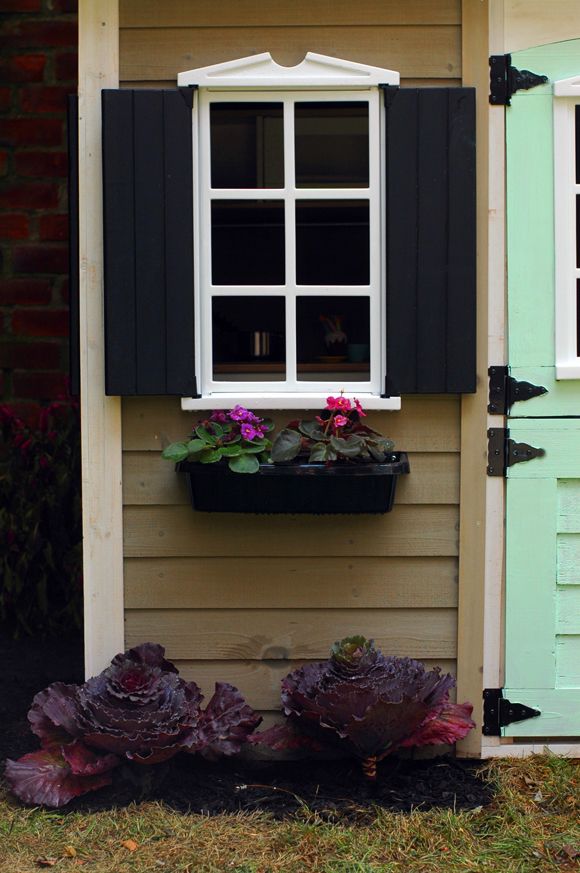
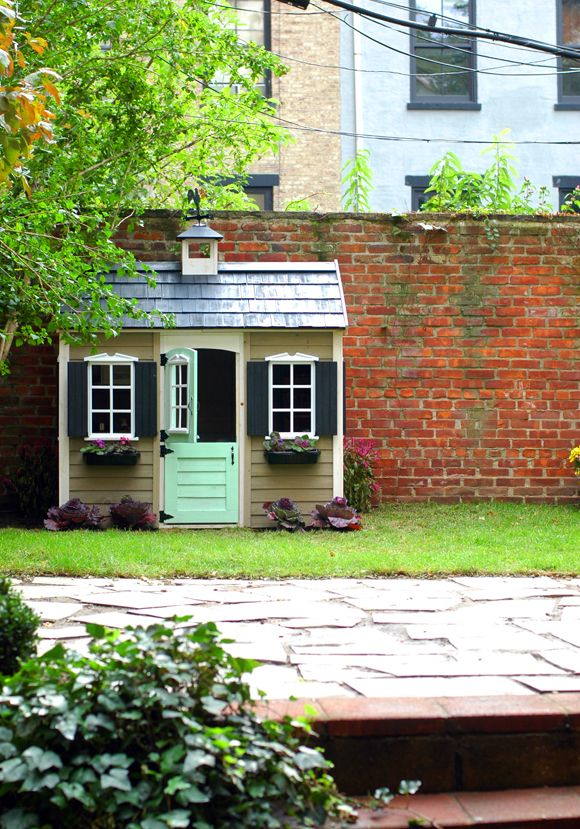
The girls helped me paint the door (it's not a perfect paint job, but I wouldn't have it any other way). We used the mint paint from this post. Isn't that dutch door the cutest?
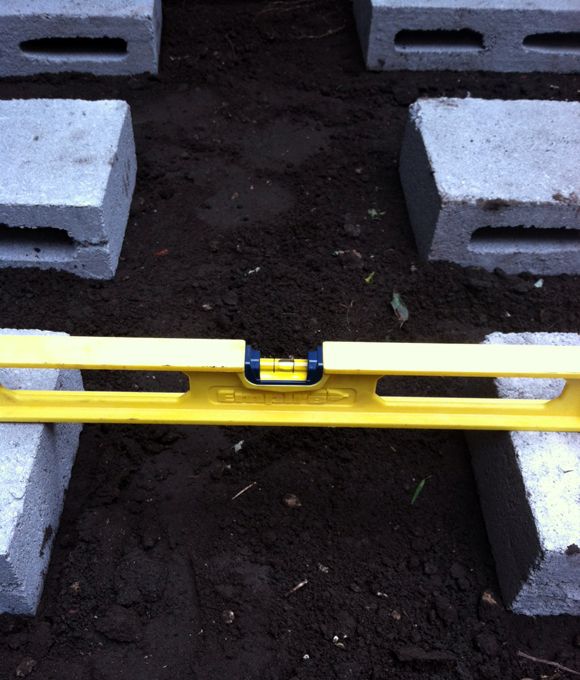
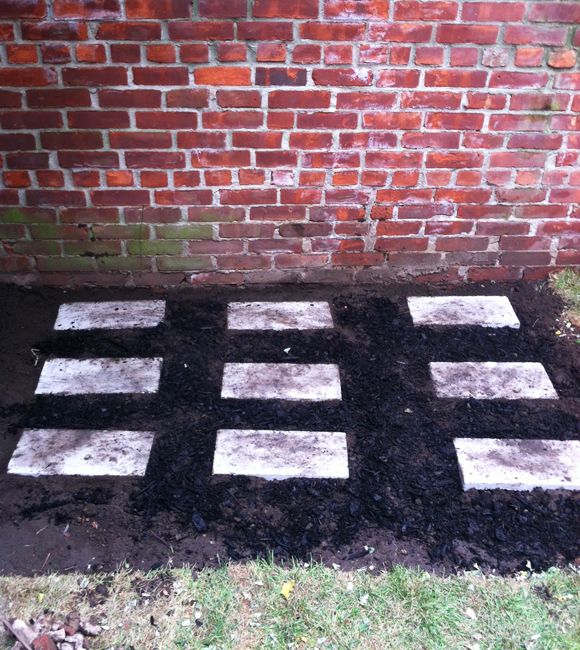
One sort of tricky thing about this playhouse is it doesn't come with a floor, so we bought some plywood to finish off the bottom. To prevent sinking or water damage, I dug the ground out a little and laid out nine cinder blocks and sort of half-buried them. It was really important to get all the cinder blocks level.
Then I filled in the gaps with mulch which is supposed to help with bugs, weeds, and moisture issues.
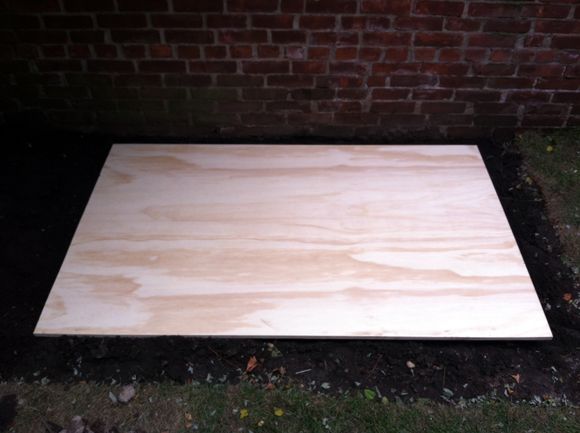
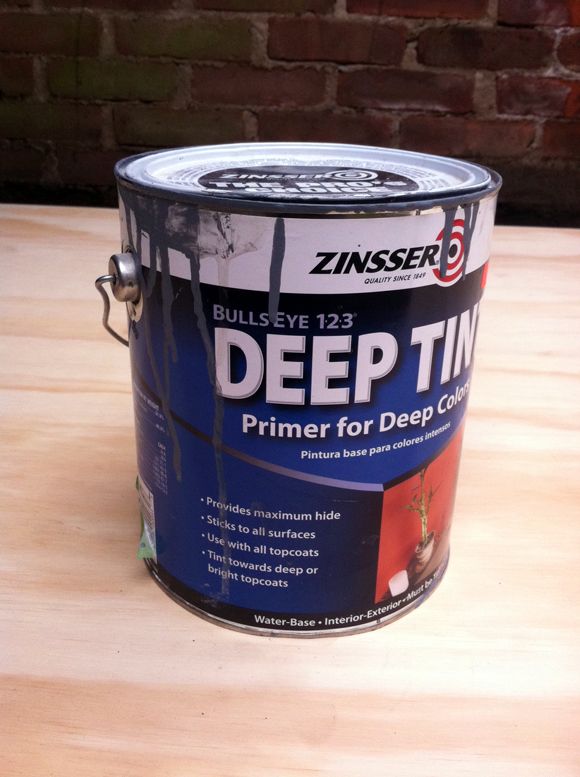
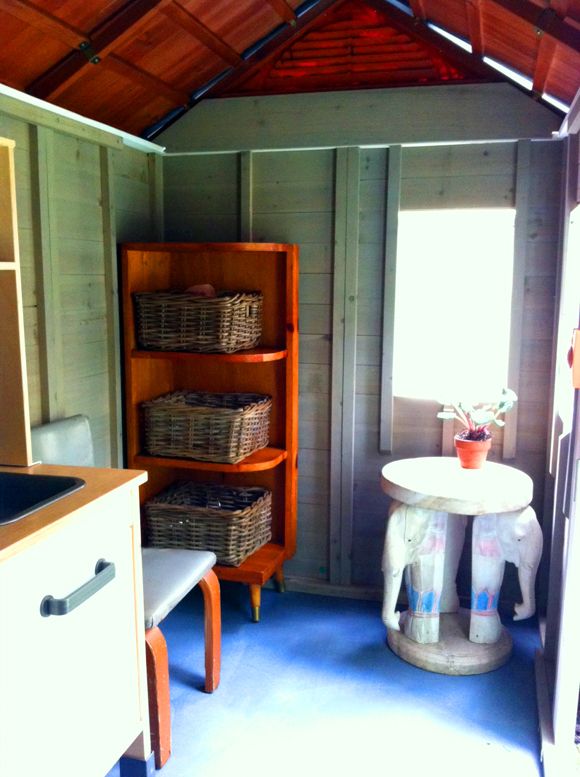
I put down the plywood, cut to fit the bottom of the playhouse, and painted it with a gray primer. I'm planning to do something else on the floor later, but I wanted to get the primer down before putting the house up.
Once the paint had fully dried, we hefted the (VERY HEAVY) finished house on top of the platform. There is a lip on the inside of the house, so we just ran some screws down into the plywood base and everything feels super secure.
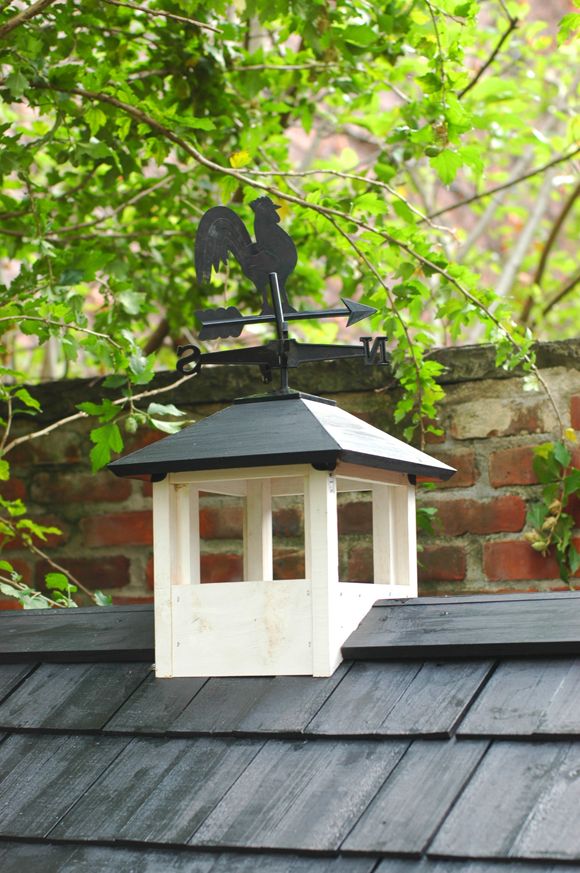
Some fun things I like about this playhouse: the funny little weathervane, the working shutters, the doorbell, the flower boxes under the windows, and the fact that I can just *barely* stand up inside the house. I feel like it's the perfect size.
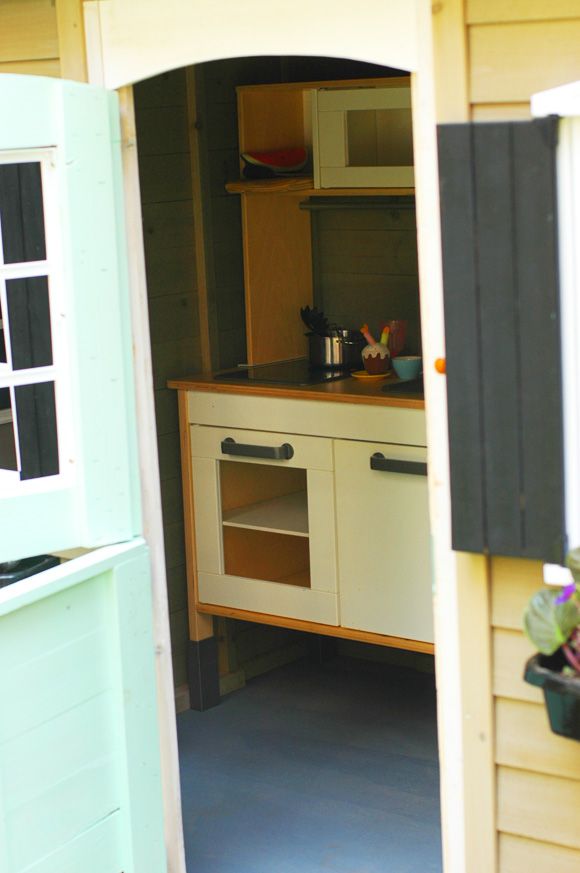
We moved our trusty play kitchen inside and it fits perfectly. I was happy to free up the floor space in the girls bedroom, too, so win-win.
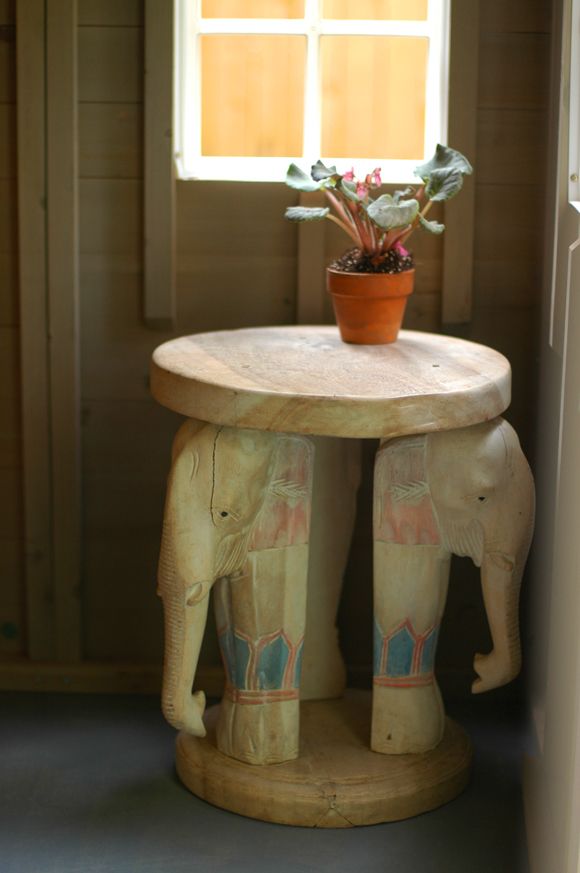
I got sick before I had much of a chance to really do anything with the inside of the playhouse, so it's pretty bare bones for now. I always want it to be on the unfussy side though, so the kids can really play without worrying.
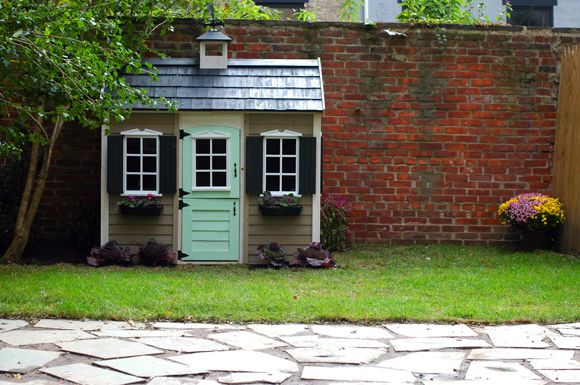
So while not being my least expensive project that I've shared on LGN, I feel like we're going to get a lot of really great use here. Zero buyer's regret.
0 comments:
Post a Comment