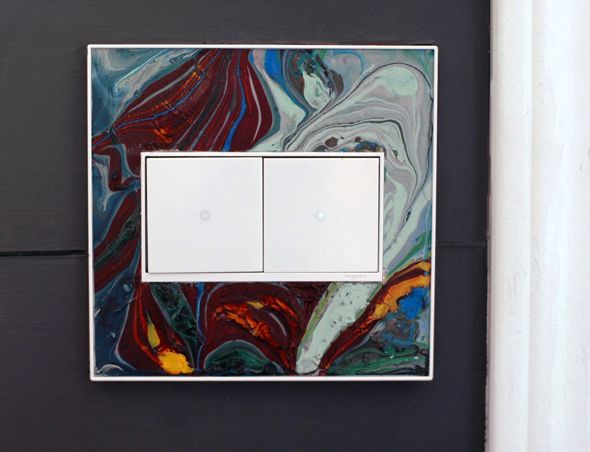
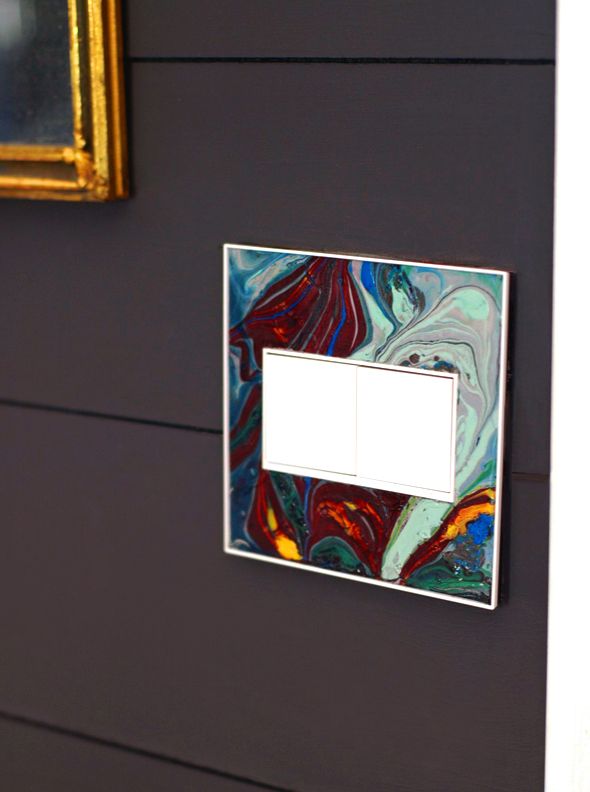
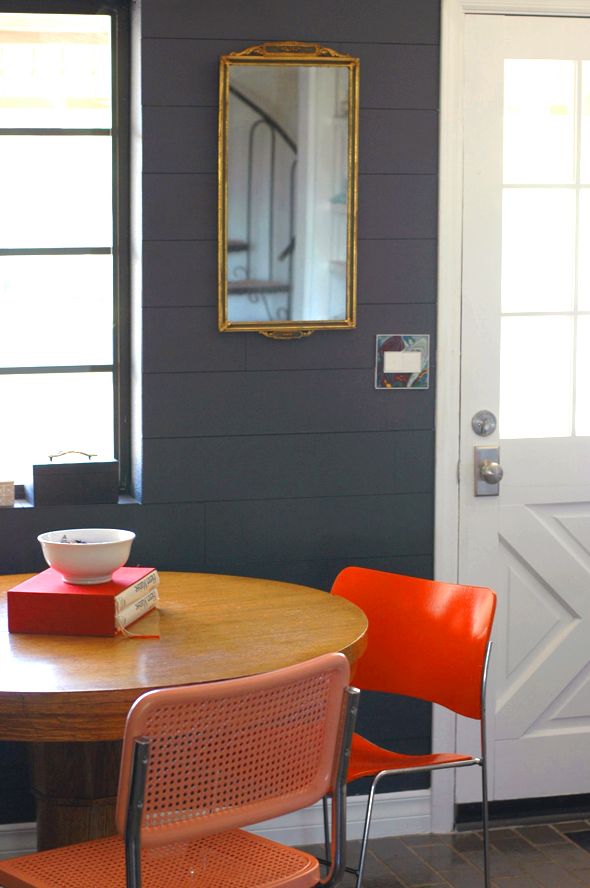
For our mudroom, I chose to replace our old school double toggle switch with a double sofTap switch. You can choose other switches that operate with motion sensors (walking by or waving your hand in front of the switch), whisper switches, dimmers, remotely-controlled smart switches - they've thought of everything. I liked the extra clean look of the sofTap and I love that there's a tiny little light that very softly illuminates the switches when they're off, which is shockingly helpful for supporting my midnight snack habit.
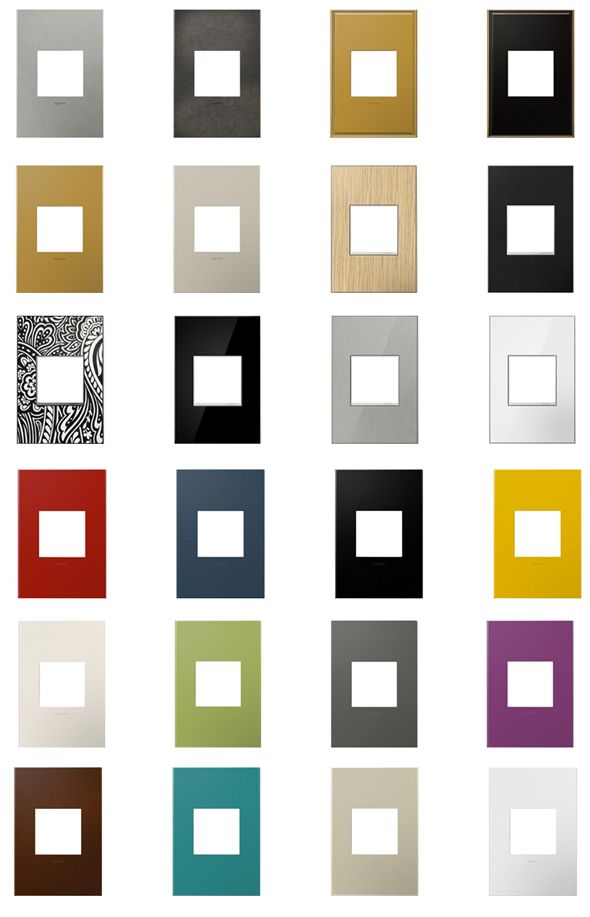
They've also covered the gamut of wall plate possibilities (above). You can go glossy modern (like the white I have in this post), mirrored, metallic, leather, all sorts of colors, or the customizable option I used here in the mudroom. That option comes with a paper mat template that you can use for wallpaper or any art project you want to create. (The tutorial for the marbled paper is after the jump.)
To enter to win a $200 shopping spree with adorne, visit the site and choose your favorite switch and wall plate combos. (PS This video really helps the switched come to life - worth a watch!) Leave a comment on this post with your choices and where you'll use your new switches. Contest ends Friday August 16 at midnight. Winner will be emailed. Good luck!!
And don't forget to click through for the marbling tutorial...
I've been dying to try a marbled paper DIY for a really long time. I LOVE marbleized anything so this felt like a natural choice for my customized wall plate.
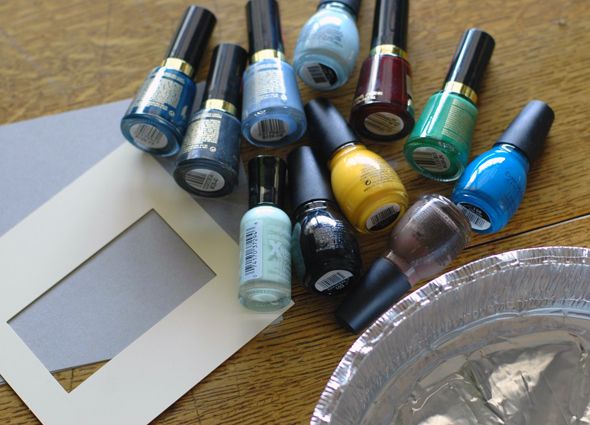
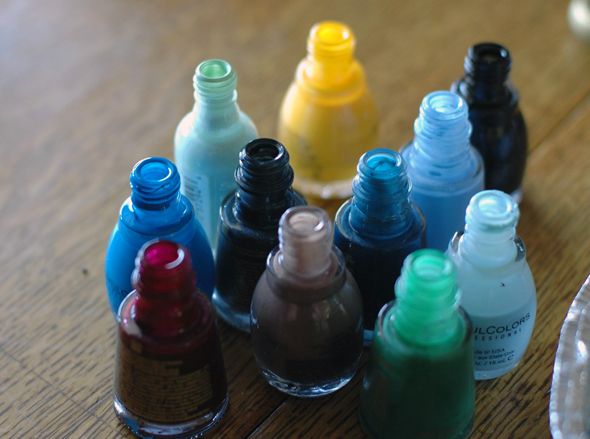
You'll need: a variety of nail polish colors (try the dollar store or CVS is having a 2 for $3 sale right now on some brands), water, a disposable container that's bigger than the paper or item that you're marbling, a toothpick or anything long and pointy (I used a long screw because our toothpicks are still packed away :)), paper or whatever you want to marble and a place to dry the items (I used a drop cloth). Also, you might want gloves, as my messy hands below will demonstrate.
By the way, I think most anything can be marbled with nail polish - the possibilities are pretty endless. Flower pots and vases, finger nails (obvs), picture frames, jewelry boxes, chair legs. There are lots of tutorials floating around the web that show all sort of cool ideas. I loved this one on Design Mom.
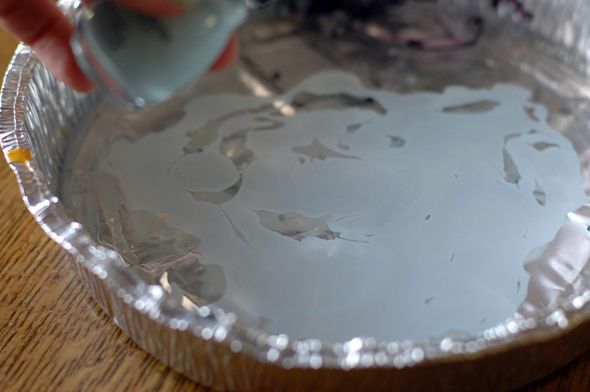
So, to start, fill your container with a bit of water. If you're marbling paper, you'll only need about an inch of water.
Take off all the lids to your nail polish to make the process go faster. You'll need to work pretty fast so that the polish doesn't start drying.
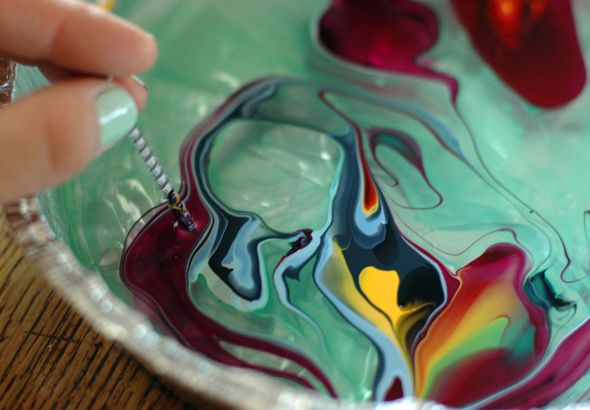
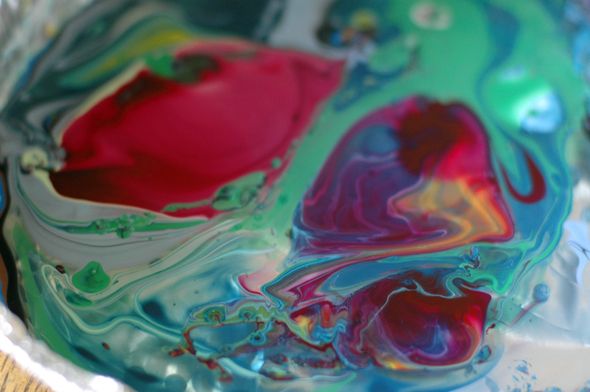
Pour your colors in rings, one on top of the other. There's no right or wrong way to do this. Just pick colors and pour. If you pour slowly, the nail polish shouldn't sink.
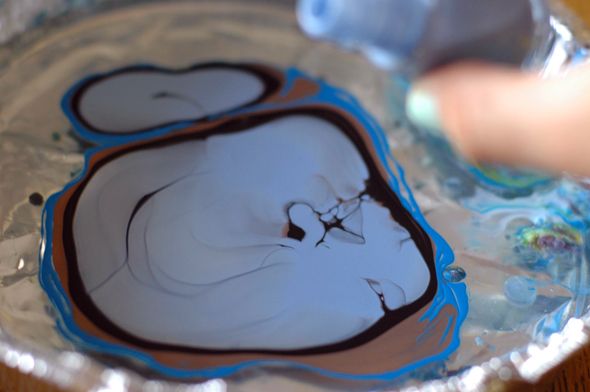
After pouring your rings, use a toothpick (or a screw) to pull the color. You're not mixing it - you're just going to move the colors around gingerly. Don't over-swirl and don't take too much time to do it.
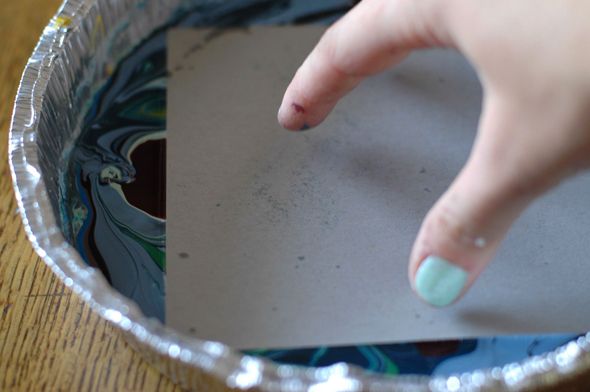
Then drop your paper onto the pattern, press softly to make sure the surfaces fully connect, and then pull off the paper and flip it around quickly but carefully to make sure the paint doesn't run. And then put it down to dry on your drop cloth.
It will be a little wet at first, but it dries quickly.
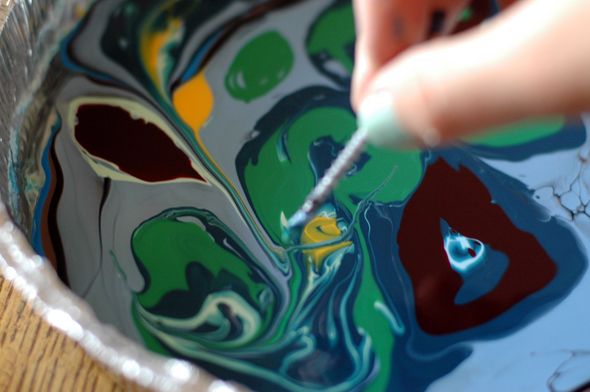
Now, don't swirl again - the new pattern will be soft and completely lovely, so just get your next paper ready and dip it. I got at least three dips from each round of pouring. And I usually ended up liking the second or third papers the very best. The paint will be thinner and more dreamy-looking.
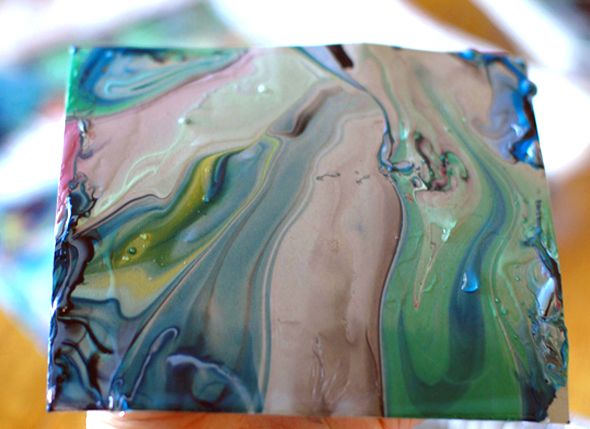
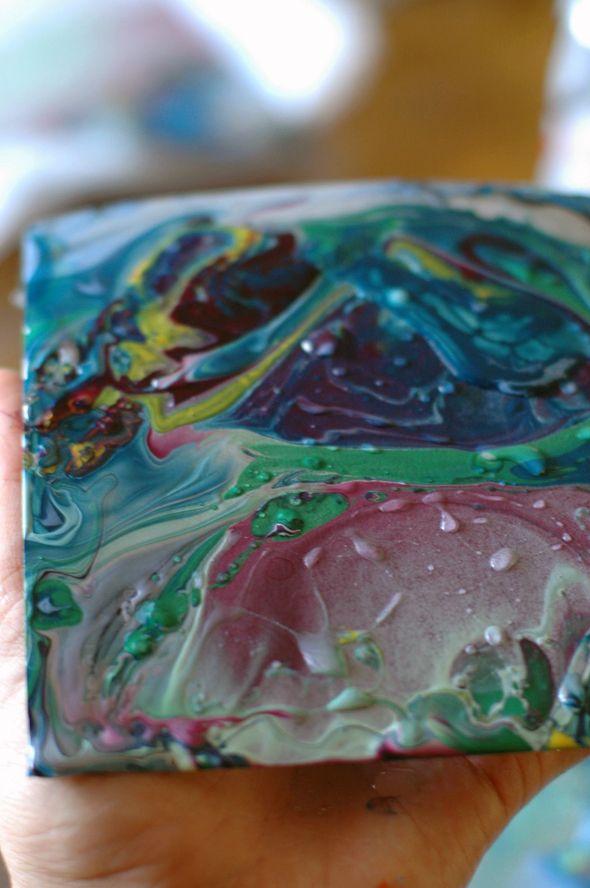
I ended up doing three or four rounds of paint pouring (I'm swimming in marbled paper if anyone wants any:) ), but these were the ones I like the best for the switch/wall plate application. I had to pick ones that had more interesting perimeters since the middle was going to get cut out for the switches.
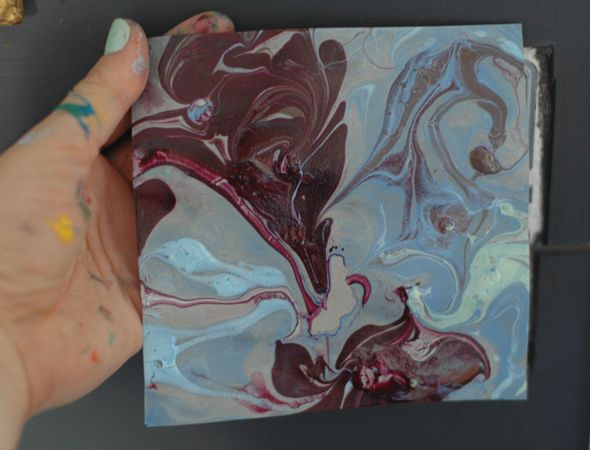

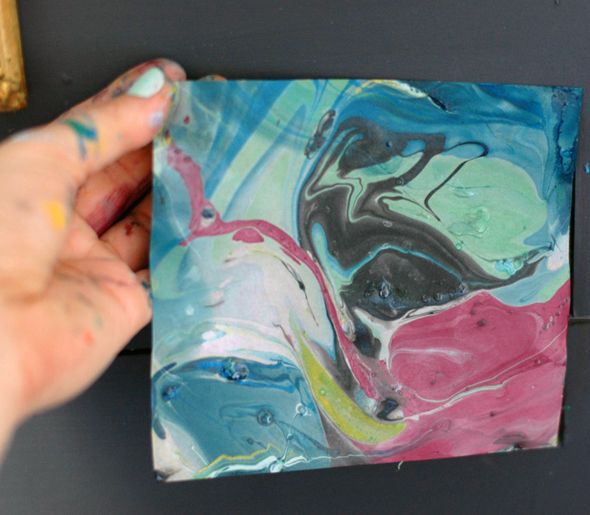
I ended up going with a darker pattern because I liked how it looked with the wall color.
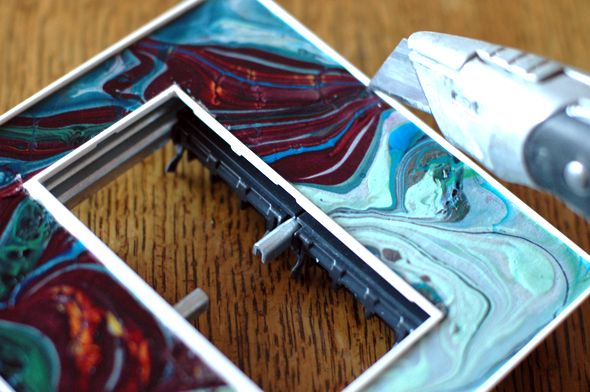
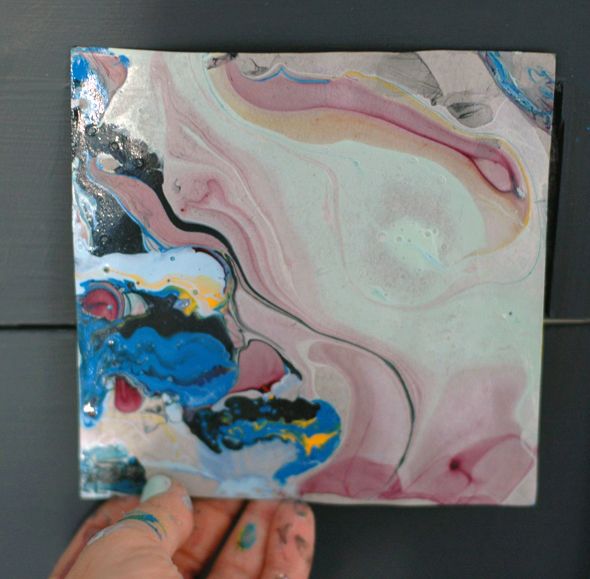
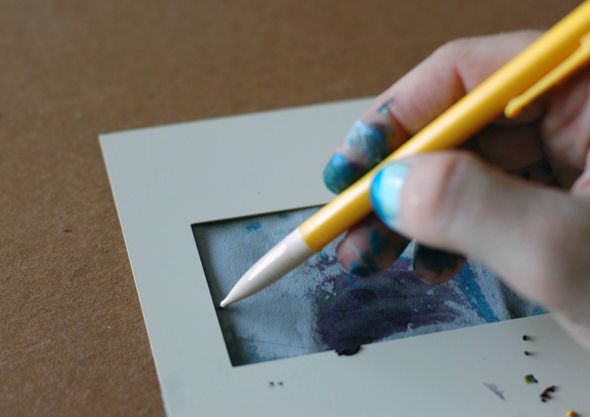
The customizable wall plate comes with a paper template that I used to trace out the hole for the switch.
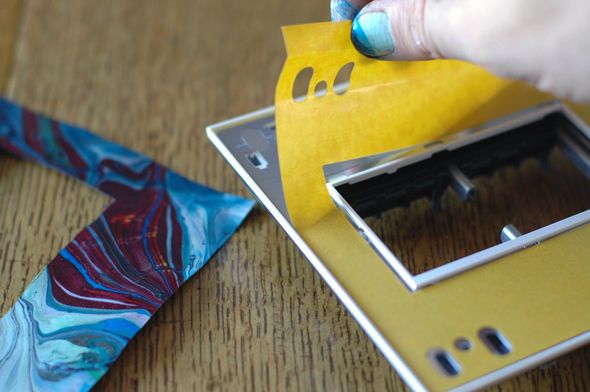
You just remove the sticker on the plate to expose the adhesive and then place your art paper.
And then I used a razor blade to make the edges fit perfectly.
The finish on the papered plate is actually pretty solid because nail polish is an enamel (and this was a first-dip paper - so there's lots of polish on there), but I might paint on a clear coat later if I feel like it needs it.
Now, go enter the give away and make your own marbled wall plates! :)
0 comments:
Post a Comment