
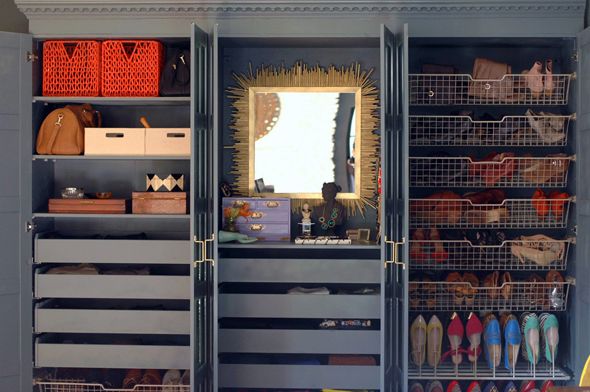
When I spruced up the Pax wardrobes for our bedroom recently, I came up with a few jewelry storage DIYs that have completely changed the way I accessorize while getting dressed. After years of cramming all of my jewelry into one unorganized box, I finally have a place for everything!
Every day this week I've got a different jewelry storage project to share with you, and first up is a few tips on how to make a functional jewelry drawer (with a liner!) in your dresser. Here's the how-to...
I've written before about wanting a jewelry armoire (this one was so pretty!), but why forfeit the floor real estate? I gave up the top drawer of my wardrobe dresser for jewelry and it's so nice to have a place that's both out of sight but easily accessible and organized.
It's important to line a jewelry drawer with felt or velvet to help all the jewelry and storage containers stay in place when you pull out and shut the drawer.

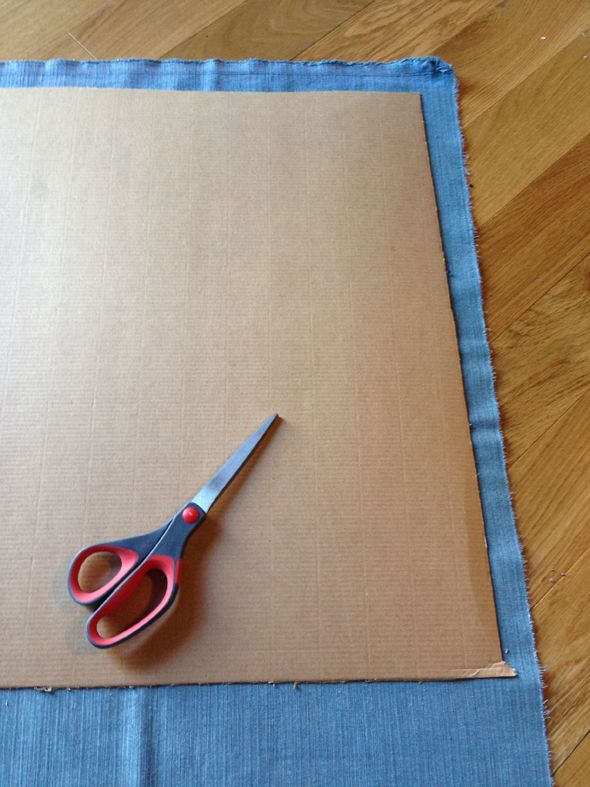
I wanted my liner to be a similar color to the wardrobe so I found a scrap remnant in my fabric stash of this teal silk velvet. I also used the IKEA box that the drawer pieces came in because I knew it would be just about the perfect size to fit inside the drawer bottom.

Then I used my beloved Fabritac to sort of upholster the piece of cardboard.
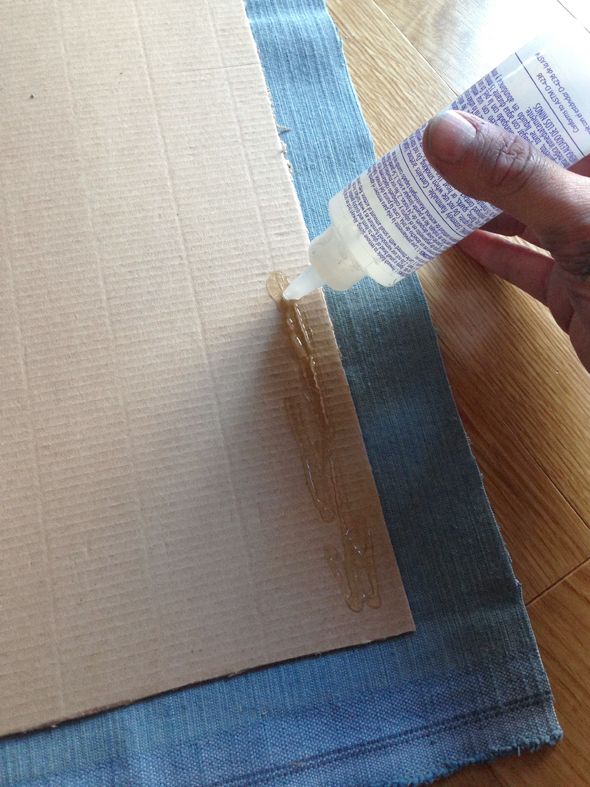
I pulled the edges tight enough that there was no need to glue in the center area of the cardboard.
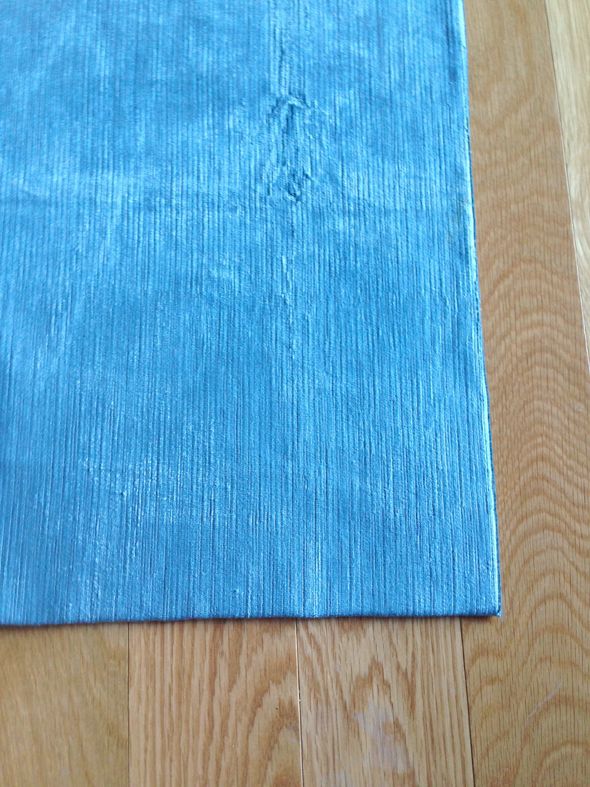
It's so hard to get wrinkles out of velvet! Thankfully the wrinkles let up naturally after a day or two of being pulled flat.
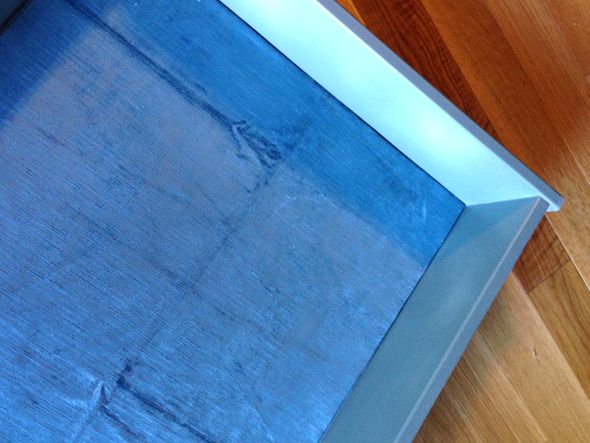
The upholstered cardboard just slips into the drawer and sits at the bottom.
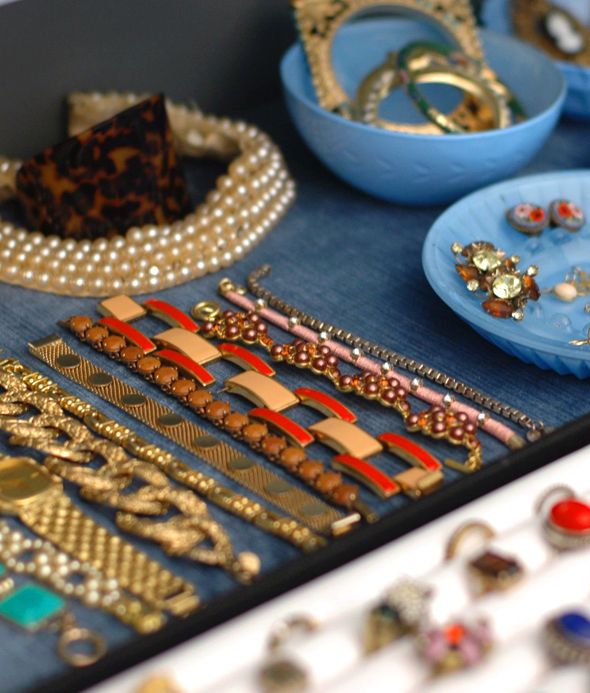
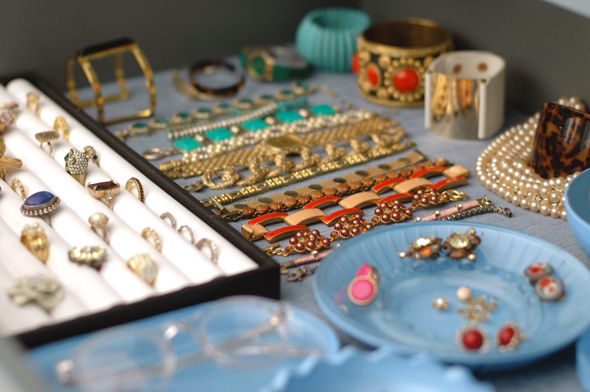
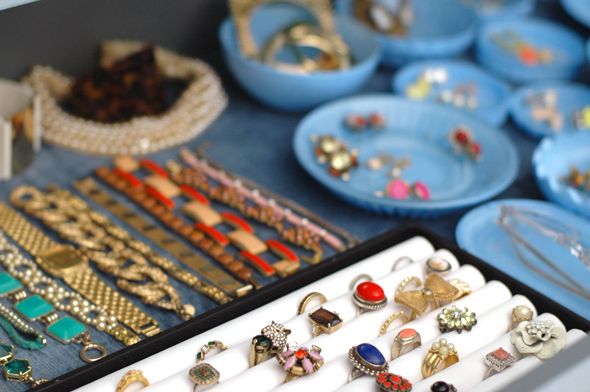
The velvet makes it so I can lay out some of my most frequently worn bracelets and bangles and they don't slide around at all.
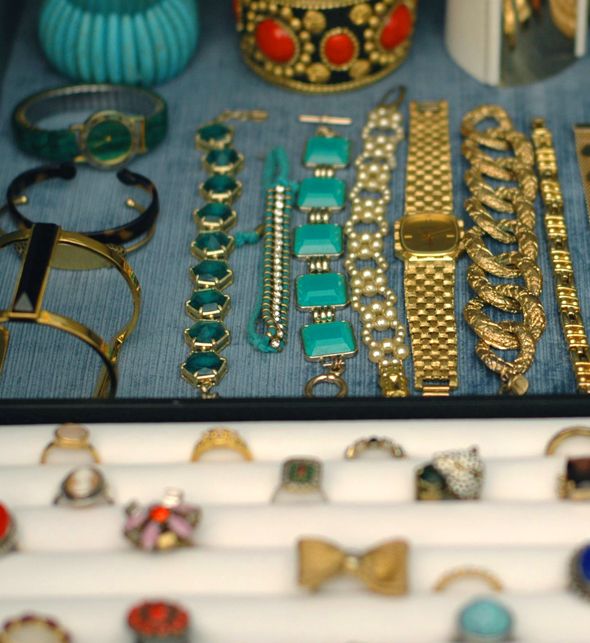
I also added a few little containers for storing some of my earrings and rings (the black and white ring tray was a $10 Amazon find and the others were mostly from a thrift store).
I'm loving having a jewelry drawer in my wardrobe dresser! I've been wearing more and different pieces of jewelry lately because it's so much easier to see what I have now that it's all laid out for me.
0 comments:
Post a Comment